DIY Treasure Chest Bank
The day started with a bit of tragedy. I was lying in bed, still half-asleep when I heard crash, shatter, scream. I jumped out of bed and bolted to living room to find a distraught little boy standing over a shattered piggy bank.
Accidents Happen
It turns out he was taking his piggy bank down off the shelf when piggy bank met fireplace brick. Fireplace brick won. We checked for cuts and after he passed inspection we shifted gears to soothing his broken heart.
We talked about how it was an accident. We talked about how accidents happen and it was a good reminder that we need to be careful when playing with fragile things. Then we talked about how we could get a new piggy bank.
The Great Piggy Bank Hunt Begins
He wasn’t on board at first. He wanted his piggy bank. We started looking up pictures of some options and he quickly changed his tune. We considered quite a few options ranging from a pig to Mickey to rhinoceros to Brachiosaurus and finally a treasure chest.
It was a pretty tight race between dinosaur and treasure chest, but in the end the treasure chest won.
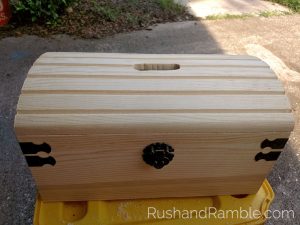
Unfortunately, treasure chest banks were quite expensive. They weren’t overly complex but they were mostly handmade or personalized or both. While they were all nice, I was not interested in spending $30 to $40 on a small wooden box with a hole on the top. Thus began our quest to Michaels for supplies to make our own treasure chest bank.
DIY Treasure Chest Bank
After using a 40% off coupon the treasure chest box only cost about $7. Given the treasure chest was intended for little hands I wanted to avoid something as toxic as wood stain, so we picked up some brown acrylic paint as well.

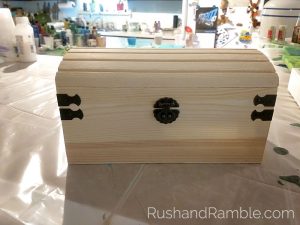
The first step was cutting the hole on the top. I marked where it I’d put the whole with a pen. It should have been as simple as drilling a starter hole and then using the Dremel tool to make an opening just large enough for coins and the occasional dollar bill. The process did not go as smoothly as hoped, so I ended up with a larger hole than I had planned.
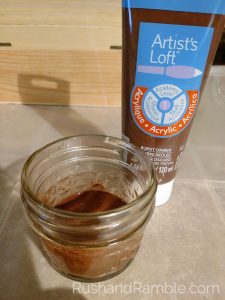
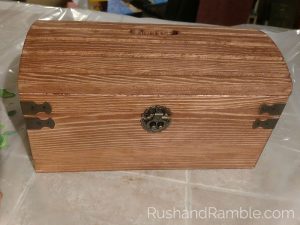
Next I stained the box. To do this, I watered down some brown acrylic paint until it was as thin as wood stain. When possible, I prefer staining wood with acrylic paint. This way I can work inside in the air conditioning and the cleanup is much easier. It also means fewer chemicals lingering on the surface and a quicker dry time so I could get to the next step of personalizing the treasure chest.
To personalize box I used my Cricket, some Oracal 651 vinyl and the most piratey font I currently had installed on my computer. Once the was cutout applied, I coated the treasure chest with some Satin Finish Polycrylic to seal the wood and vinyl.
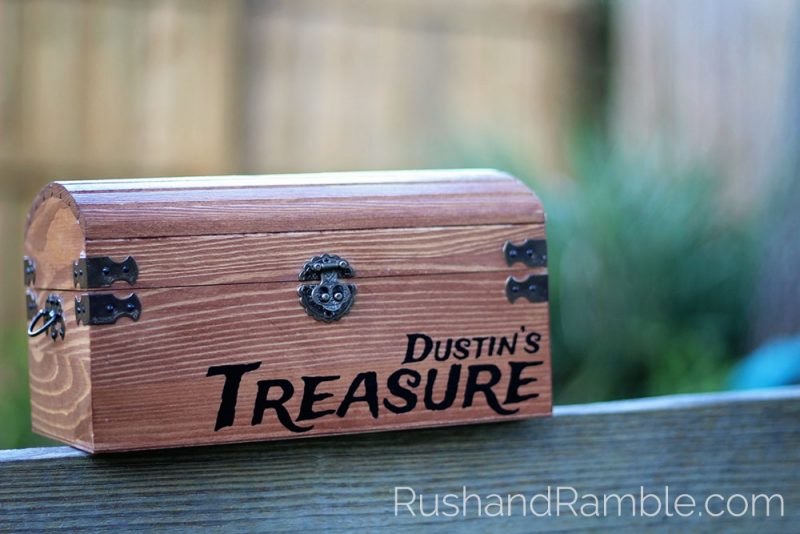
Voila. A brand new, preschooler-approved bank at a fraction of the cost.
It wasn’t a difficult craft and could easily be done without the use of a vinyl cutter. You could also have your kids paint the treasure chest themselves if they would like to be involved in the process. Or pick up a different style box. Or maybe even a bird house. The possibilities are endless.
Whatever you choose, I hope you enjoy creating your custom, DIY bank.
What Kind of Bank Do You Use?
Obviously we used to have a ceramic piggy bank before making our wooden treasure chest. We also have a large glass jug we use to collect found coins around the house. What type of piggy bank do your kids use?